Custom Params
|
This module is currently unavailable and will be available in future versions. The documentation below is provided for reference only. |
Custom Params is the place where operators review and maintain custom parameter groups and parameter paths for a selected Client Type. These settings matter because changes can add, remove, or reorganize parameter paths for that Client Type. Use this module to inspect the current state, manage groups and parameters (with permissions), and apply bulk updates safely via export and import.
When to use Custom Params
Use Custom Params when you need to:
-
inspect the current parameter groups and parameter paths,
-
manage groups and parameters (permission-based),
-
export a snapshot for backup or change review,
-
import a prepared JSON file to apply bulk updates.
Prerequisites
-
A Client Type must be selected (for example: DEF, MC, SC).
-
Your role determines which tabs and actions are available.
Roles & permissions
- VIEWER
-
Read-only access. Can browse and export configurations.
- EDITOR
-
VIEWER access + can edit configurations (create/update/delete/import).
- ADMIN
-
EDITOR access + user management (create/edit/disable/delete users).
In Custom Params specifically:
-
VIEWER — use View and export from Import/Export.
-
EDITOR / ADMIN — can also use Manage and import changes.
| If the Client Type is not selected, the module shows a guarded/empty state and does not load data. |
Key concepts
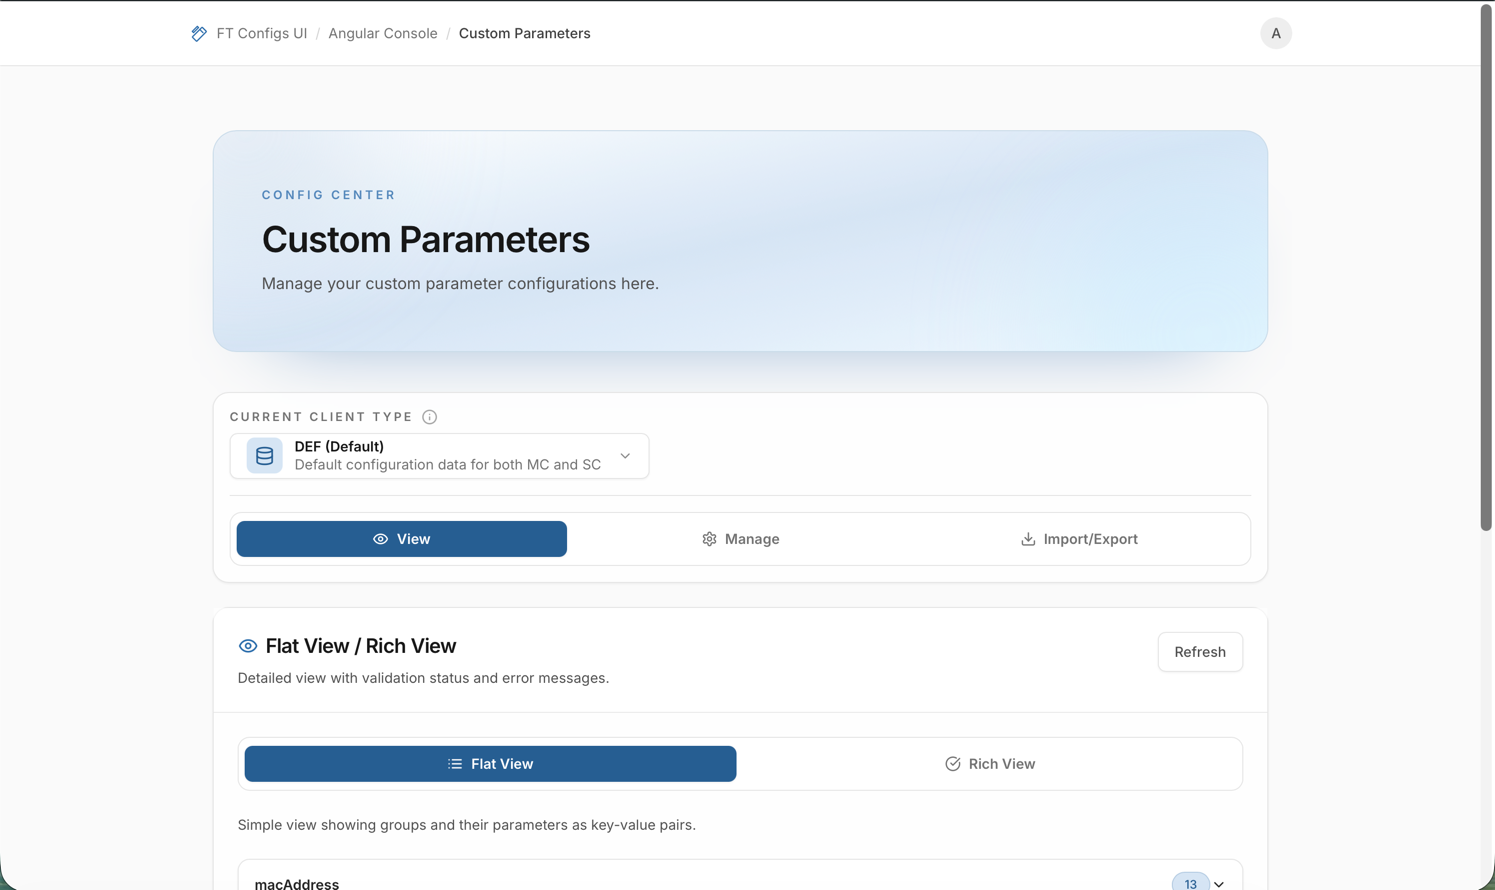
Custom Params is organized around three work modes (tabs):
- View
-
Read-only browsing. Use Flat View for fast navigation, or Rich View to scan validation status and messages.
- Manage (EDITOR / ADMIN)
-
Create, edit, and delete parameter groups and parameters.
- Import/Export
-
Export a snapshot file, or import bulk changes with mandatory Dry-run.
- Groups and parameters
-
-
A group is a container identified by a Group Key.
-
A parameter is a single entry inside a group, shown as a Parameter Path.
-
| All actions are scoped to the currently selected Client Type. Changes in one Client Type do not affect other Client Types. |
View parameters
Use this task to review what is currently configured without making changes.
-
Open Custom Params from the Angular Console dashboard.
-
Confirm the correct Client Type in the toolbar.
-
Open the View tab.
-
Choose a view:
-
Flat View — lists groups and their parameter paths.
-
Rich View — adds validation status for faster review.
-
-
Expand a group to see its parameters.
What you should see:
-
a list of groups for the selected Client Type,
-
the number of parameters per group,
-
in Rich View, group and parameter markers for Valid, Warning, and Invalid.
How to interpret validation markers
In Rich View, each parameter is marked:
-
Valid — no issues reported.
-
Warning — attention recommended; open the message and confirm the parameter path is intended.
-
Invalid — the UI reports a validation issue; treat this as blocking for imports and follow up with an administrator if you do not understand the cause.
| Hover a warning or invalid entry to read the message shown by the UI. |
Quick checks
-
Verify the selected Client Type before reviewing or changing anything.
-
Use Refresh after edits or imports.
-
Scan Rich View for warnings/errors and open their messages.
-
Before any change, export a snapshot: Export a Snapshot.
Manage groups and parameters (EDITOR / ADMIN)
Use this task for targeted edits. For bulk changes, prefer Import with Dry-run.
Create or edit a group
-
Open the Manage tab.
-
In Parameter Groups, click New Group.
-
Enter the Group Key and save.
-
To rename a group, use the edit action in the groups list and save.
Expected result: the group appears in the left list and can be selected to manage its parameters.
Delete a group
-
In the groups list, locate the group.
-
Use the delete action and confirm.
| The delete confirmation notes that removing a group also removes all parameters inside it. Proceed only if you accept that impact. |
Create or edit a parameter
-
Select a group on the left.
-
In Parameters, click New Parameter.
-
Enter the Parameter Path and save.
-
To edit an existing parameter, use the edit action, update the path, and save.
Expected result: the parameter appears in the right table for the selected group.
Delete a parameter
-
Select the group and locate the parameter.
-
Use the delete action and confirm.
Pattern/regex warning (what to verify)
The UI may warn when a parameter path looks like a pattern/regex (for example, it contains % or .i.).
| Treat these entries as higher risk. Before saving or importing them, verify: |
-
you are working under the correct Client Type,
-
the parameter path is exactly what you intended to add,
-
the import dry-run preview (if importing) does not show unexpected creations or deletions.
| After significant manual edits, export a snapshot for backup and audit: Export a Snapshot. |
Export a snapshot
Exporting creates a backup of the current Custom Params for the selected Client Type.
-
Open the Import/Export tab.
-
Under Export Parameters, click Download JSON.
| Store the exported file alongside the change ticket (module + Client Type + date). For details, see Export a Snapshot. |
Import with Dry-run (EDITOR / ADMIN)
Use import when you need to apply many changes at once. Always follow the safety flow: export → dry-run → apply.
-
Export a snapshot first: Export a Snapshot.
-
Open the Import/Export tab and click Upload JSON.
-
Choose the import mode (MERGE or REPLACE).
See Merge vs Replace.
-
Select a JSON file.
-
Wait for the dry-run preview to complete.
-
Dry-run runs automatically after you select a file.
-
Changing the file or switching MERGE/REPLACE re-runs the preview.
-
-
Review the preview and confirm you accept the plan.
-
Click Confirm Import only when the preview matches your intent.
Import safety checklist
-
Confirm you are in the correct environment.
-
Confirm your selected context (for example, client type) matches the file.
-
Export a snapshot before changes.
-
Run Dry-run and review:
-
errors (must be resolved),
-
warnings (understand impact),
-
create/update/delete counts.
-
-
If using REPLACE, confirm you accept deletions shown in the dry-run plan.
-
Apply import and immediately verify by refreshing and re-opening the affected entries.
Troubleshooting
- I don’t see the Manage tab or the import action
-
You are likely signed in as VIEWER. Editing and import are available only for EDITOR or ADMIN.
- No data is shown
-
Confirm a Client Type is selected. If the module shows a guard message, select DEF/MC/SC in the toolbar.
- Dry-run shows errors
-
The file does not match the expected JSON structure or contains invalid values. Start from a fresh export snapshot, apply your edits, and retry the import.
- Unexpected deletions shown in dry-run
-
You may be using REPLACE, or your file is missing existing groups/parameters. Switch to MERGE or regenerate the file from an export snapshot, then re-run the preview.
- Pattern/regex warning
-
Re-check the exact parameter path, confirm it is intentionally pattern-like, and ensure the dry-run preview does not introduce unintended changes. If unsure, stop and confirm with an administrator.