Custom Params
|
This module is not available in the current version. It will be available in a future version. Use this page for reference only. |
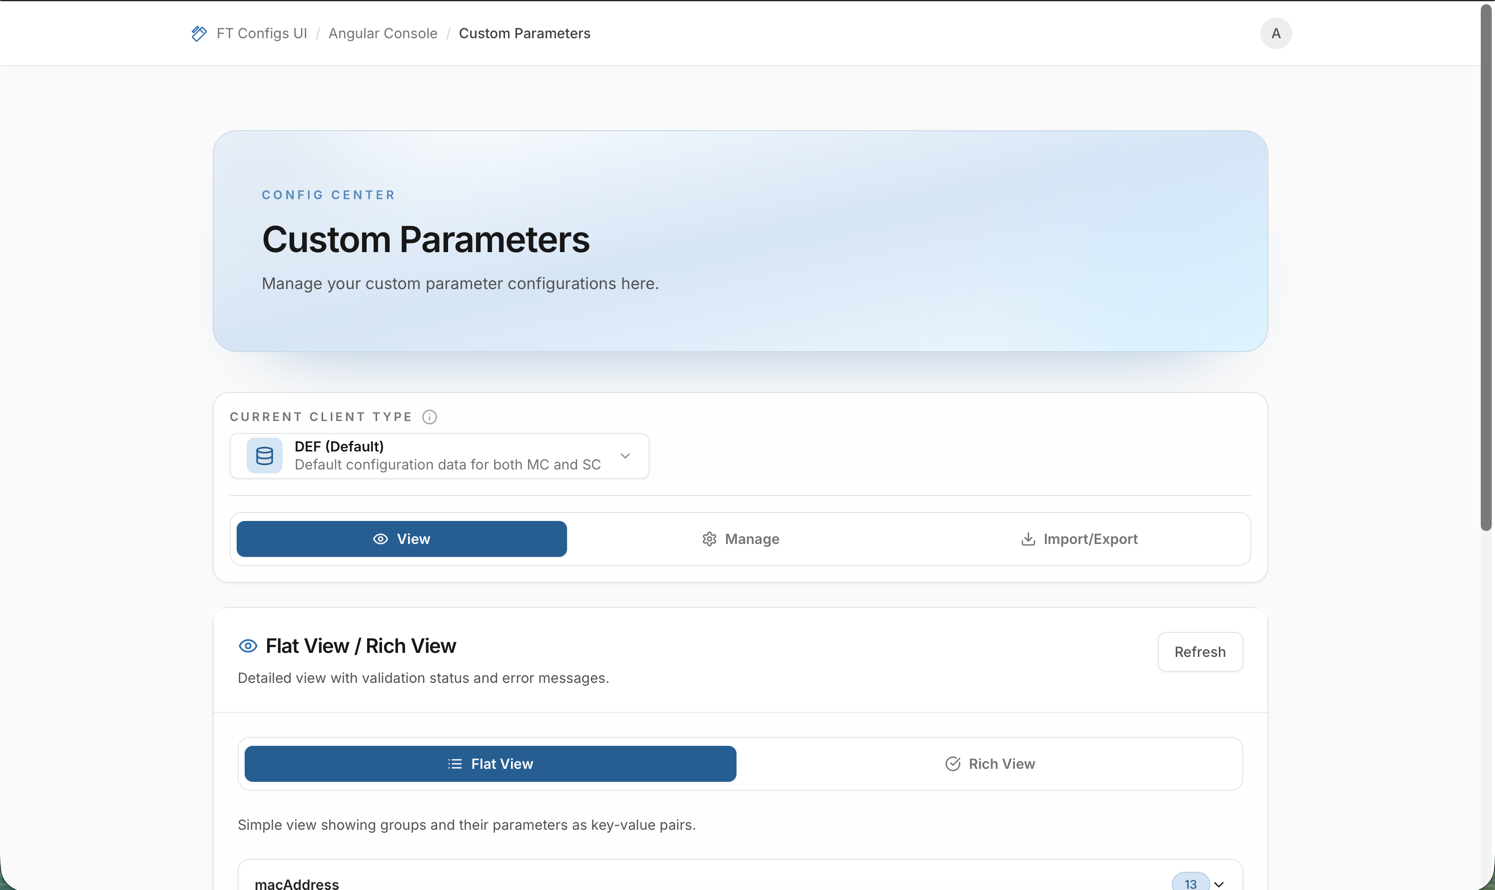
Custom Params is where operators review and maintain custom parameter groups and parameter paths for a selected Client type. A change can add, remove, or reorder parameter paths of the client type. Use this module to see the current state and to manage groups and parameters, if you have permission. Use export and import to apply bulk changes safely.
Where to find parameter descriptions: The page shows field labels only. A group has a key. Each item in a group is a device parameter path.
When to use it
Use Custom Params to do the following:
-
Review the parameter groups and parameter paths.
-
Manage groups and parameters, if you have permission.
-
Export a snapshot for backup or change review.
-
Import a prepared JSON file to apply bulk changes.
Before you start
-
Open Custom Params from the Angular Console dashboard.
-
Select a Client type: DEF, MC, or SC.
-
Check your role. Your role decides the tabs and actions.
| If you do not select a client type, the module shows an empty state and loads no data. |
Roles & permissions
- VIEWER
-
Read-only access. You can browse and export configurations.
- EDITOR
-
All VIEWER access. You can also create, change, delete, and import configurations.
- ADMIN
-
All EDITOR access. You can also manage users: create, change, disable, and delete.
Roles in Custom Params:
-
VIEWER: use View, and export from Import/Export.
-
EDITOR or ADMIN: also use Manage and import changes.
Work modes
Custom Params has three tabs:
- View
-
Read-only browsing. Use Flat View for fast navigation. Use Rich View to see the validation status and messages.
- Manage (EDITOR or ADMIN)
-
Create, edit, and delete parameter groups and parameters.
- Import/Export
-
Export a snapshot file, or import bulk changes. Import needs a Dry-run.
- Groups and parameters
-
-
A group holds parameters. A Group Key identifies the group.
-
A parameter is one entry in a group. The UI shows it as a Parameter Path.
-
| All actions work on the selected Client type. A change in one client type does not change other client types. |
View parameters
Use this task to review the current configuration without changes.
-
Open the View tab.
-
Check the Client type in the toolbar.
-
Select a view.
-
Flat View: lists groups and their parameter paths.
-
Rich View: adds the validation status.
-
-
Expand a group to see its parameters.
Expected result:
-
You see the groups of the selected client type.
-
You see the number of parameters in each group.
-
In Rich View, groups and parameters show the markers Valid, Warning, and Invalid.
| Point to a warning or invalid entry to read the UI message. |
Validation markers
In Rich View, each parameter has one marker:
-
Valid: the check finds no problem.
-
Warning: check the message and check if the parameter path is correct.
-
Invalid: the UI reports a validation problem. This blocks imports. If you do not understand the cause, ask an administrator.
Quick checks
-
Check the selected Client type before you review or change anything.
-
Click Refresh after changes or imports.
-
Read the warnings and errors in Rich View.
-
Before any change, export a snapshot: Export a Snapshot.
Manage groups and parameters
Required role: EDITOR or ADMIN.
Use these tasks for single changes. For bulk changes, use Import with Dry-run.
Add or rename a group
-
Open the Manage tab.
-
In Parameter Groups, click New Group.
-
Enter the Group Key and save.
-
To rename a group, click the edit action in the groups list, change the key, and save.
Expected result: the group is in the left list. You can select it to manage its parameters.
Delete a group
-
In the groups list, find the group.
-
Click the delete action and confirm.
| The delete confirmation says: the delete also removes all parameters in the group. Continue only if you accept this. |
Add or change a parameter
-
Select a group on the left.
-
In Parameters, click New Parameter.
-
Enter the Parameter Path and save.
-
To change a parameter, click the edit action, change the path, and save.
Expected result: the parameter is in the right table for the selected group.
Pattern warning
The UI can warn you if a parameter path looks like a pattern (regular expression).
For example, the path contains % or .i..
| These entries have a higher risk. Before you save or import them, check these points: |
-
You work in the correct Client type.
-
The parameter path is exactly the path you want to add.
-
The import dry-run preview shows no unexpected creations or deletions.
| After large manual changes, export a snapshot for backup and audit: Export a Snapshot. |
Export a snapshot
Export creates a backup of the current Custom Params of the selected client type.
-
Open the Import/Export tab.
-
Under Export Parameters, click Download JSON.
| Save the exported file with the change ticket. Use the module name, the client type, and the date in the file name. For details, see Export a Snapshot. |
Import with dry-run
Required role: EDITOR or ADMIN.
Use import to apply many changes at once. Always follow this order: export, dry-run, apply.
-
Export a snapshot first: Export a Snapshot.
-
Open the Import/Export tab and click Upload JSON.
-
Select the import mode: MERGE or REPLACE.
See Merge vs Replace.
-
Select a JSON file.
-
Wait for the dry-run preview.
-
The dry-run starts after you select a file.
-
The preview runs again if you change the file or switch between MERGE and REPLACE.
-
-
Read the preview and check if you accept the plan.
-
Click Confirm Import only if the preview matches your intent.
Import safety checklist
-
Check the environment name.
-
Check the selected client type. It must match the file.
-
Export a snapshot before you change data.
-
Run Dry-run and review:
-
the errors: you must fix them,
-
the warnings: you must understand them,
-
the create, update, and delete counts.
-
-
If you use REPLACE, review the deletions in the dry-run plan. Continue only if you accept them.
-
Apply the import.
-
Refresh the page and open the changed entries to check them.
Troubleshooting
- You do not see the Manage tab or the import action
-
You are probably signed in as VIEWER. Only EDITOR and ADMIN can change and import.
- The page shows no data
-
Check if a Client type is selected. If the module shows a guard message, select DEF, MC, or SC in the toolbar.
- Dry-run shows errors
-
The file has a wrong JSON structure or invalid values. Start from a new export snapshot, make your changes, and import again.
- Dry-run shows unexpected deletions
-
You can be using REPLACE, or your file misses existing groups or parameters. Switch to MERGE, or create the file again from an export snapshot. Then run the preview again.
- Pattern warning
-
Check the exact parameter path and check if it is meant to be a pattern. Check if the dry-run preview shows no unwanted changes. If you are not sure, stop and ask an administrator.