Northbound Config
|
This module is currently unavailable and will be available in future versions. The documentation below is provided for reference only. |
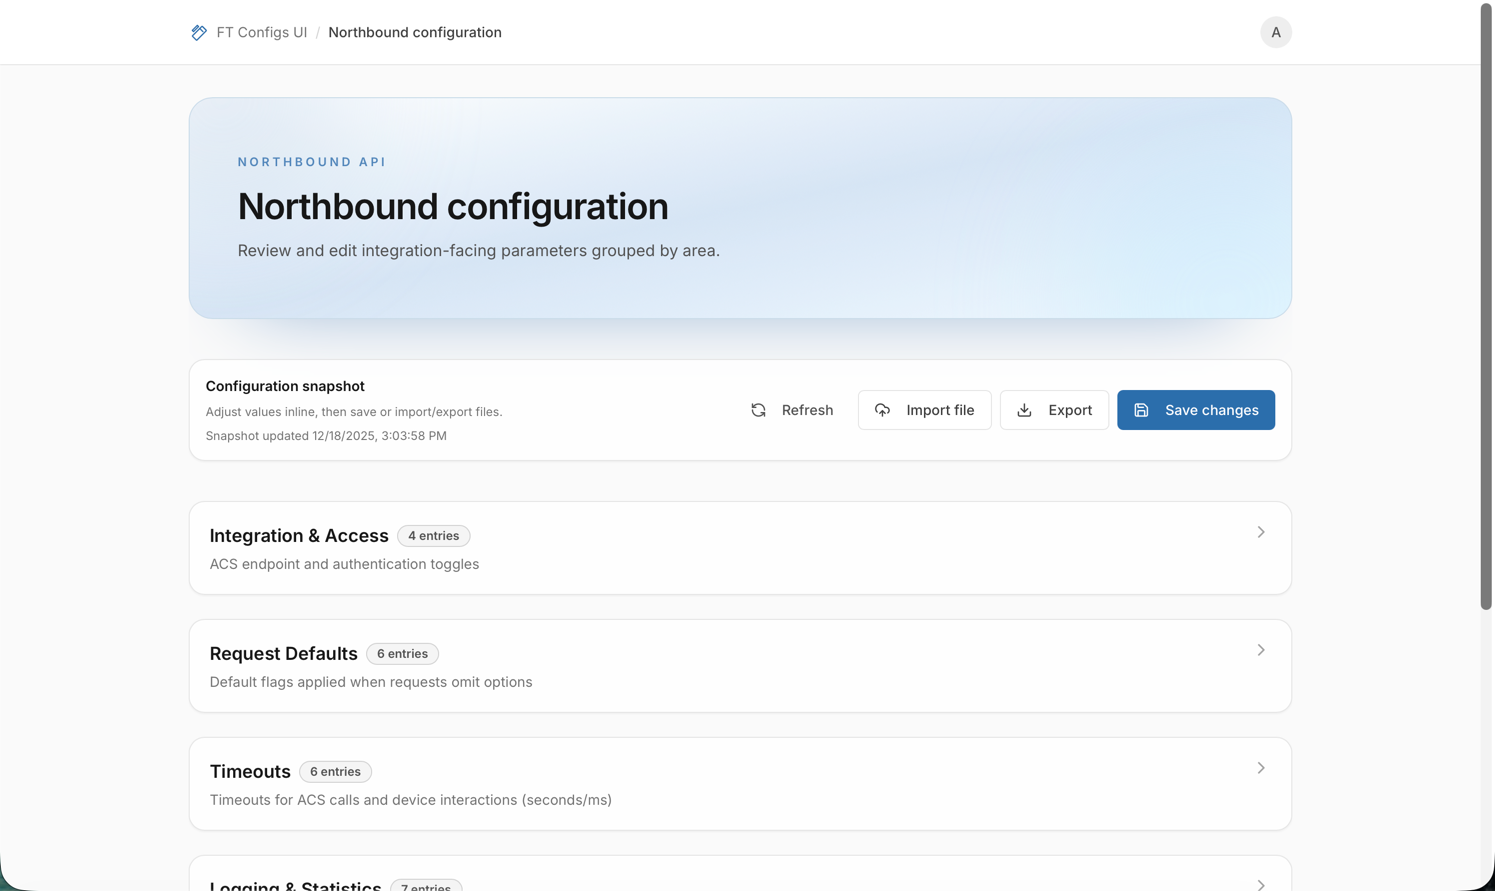
Northbound Config lets operators review and adjust integration-facing configuration values for the Northbound API. Use it to browse configuration groups, edit individual entries, and manage bulk changes by exporting a snapshot or importing a file. Because these settings can affect external integrations, work in small steps: rely on inline validation when editing and always import with dry-run before applying changes.
When to use Northbound Config
Use Northbound Config when you need to:
-
review the current northbound configuration by group,
-
change editable entries (EDITOR / ADMIN),
-
export a snapshot as a backup before changes,
-
import changes in bulk from a file (EDITOR / ADMIN).
Prerequisites
Before working with Northbound Config:
-
Confirm you are logged into the correct environment (staging/production as applicable).
-
Northbound Config does not use Client Type selection (there is no client type selector on this page).
-
Confirm your permissions:
-
VIEWER — browse configuration and Export.
-
EDITOR / ADMIN — edit values (Save changes) and Import file.
-
| VIEWER accounts run in read-only mode. Write actions (Save/Import) are blocked. |
Browse configuration
To browse existing configuration:
-
Open Northbound Config.
-
(Optional) Click Refresh to load the latest snapshot.
-
Expand a configuration group to view its entries.
| This page does not currently provide a dedicated search/filter control. Expand the relevant group and scroll to find an entry. |
What you should see
-
Groups displayed as cards, each showing a title, optional description, and entry count.
-
Entries displayed as cards with:
-
a label and description,
-
an entry code (monospace),
-
a value editor (input, toggle, select, or textarea),
-
badges such as Required, Locked, Secret, and Changed.
-
-
Read-only entries marked as Locked and rendered non-editable.
Edit entries safely (EDITOR/ADMIN)
Edits are not saved automatically. Your changes are persisted only when you click Save changes.
-
Open the relevant group.
-
Change the entry value.
-
Review inline validation feedback (shown under the field and in the page alert).
-
Click Save changes.
Expected outcomes:
-
On success, the UI confirms the save and the Changed badge clears.
-
If there are no changes, Save changes shows a No changes to save message.
-
If any entry has validation errors, saving is blocked until you fix the highlighted fields.
Validation behavior (inline):
-
Required fields cannot be empty.
-
Value types are validated (Boolean, Integer, URL).
-
Constraints may apply depending on the entry (min/max, allowed values, regex pattern).
| Do not navigate away or refresh the page with unsaved edits. Northbound Config does not auto-save. |
After edit checklist
-
Re-open the edited group.
-
Confirm the value matches your intended state.
-
(Optional) Export a snapshot for audit: Export a Snapshot.
Export configuration
Export downloads the current Northbound configuration snapshot as a .properties file.
-
Open Northbound Config.
-
Click Export.
-
Save the downloaded snapshot in a safe, traceable location (ticket attachment or versioned storage).
For export best practices (when to export, naming, and retention), see: Export a Snapshot.
Import with dry-run (mandatory)
Northbound import uses the unified import dialog with a mandatory dry-run.
- Supported file types
-
The file picker accepts
.propertiesand.xmlfiles (for exampleapi.propertiesorSettings.xml).
Steps
-
Export a snapshot first (recommended): Export a Snapshot.
-
Click Import file.
-
Choose an import mode:
-
MERGE — add or update keys present in the file.
-
REPLACE — overwrite existing keys and remove entries missing from the upload.
For definitions, see Glossary.
-
-
Select or drag-and-drop the file.
-
Review the Dry-run completed panel:
-
If errors are listed, fix the file and select it again.
-
If dry-run reports no errors, the Import file button becomes enabled.
-
-
Click Import file to apply the import.
Expected outcomes:
-
Dry-run runs automatically after you select a file and after you change the import mode.
-
Changing the file or the mode invalidates the previous dry-run and triggers a new one.
-
Import is blocked until dry-run finishes with zero errors.
Import safety checklist
-
Confirm you are in the correct environment.
-
Confirm your selected context (for example, client type) matches the file.
-
Export a snapshot before changes.
-
Run Dry-run and review:
-
errors (must be resolved),
-
warnings (understand impact),
-
create/update/delete counts.
-
-
If using REPLACE, confirm you accept deletions shown in the dry-run plan.
-
Apply import and immediately verify by refreshing and re-opening the affected entries.
| In Northbound Config, the dry-run panel currently reports validation errors only and does not show create/update/delete counts or warnings. |
For common import concepts and terminology, see: Import with Dry-run.
Troubleshooting
- Save changes does not persist
-
Fix validation errors shown under fields (and in the page alert), then try again.
- I can’t edit or import
-
Confirm your role is EDITOR or ADMIN. VIEWER accounts are read-only and cannot write changes.
- Import file button stays disabled
-
Wait for dry-run to finish. If dry-run lists errors, correct the file and re-select it.
- Import is rejected or fails
-
Verify the file extension is supported (
.propertiesor.xml) and that the content matches the expected format. Start from an exported snapshot as the base. - No configuration is shown
-
Click Refresh. If the page still shows an empty state, confirm you are in the correct environment or import a file to load configuration.