Northbound Config
|
This module is not available in the current version. It will be available in a future version. Use this page for reference only. |
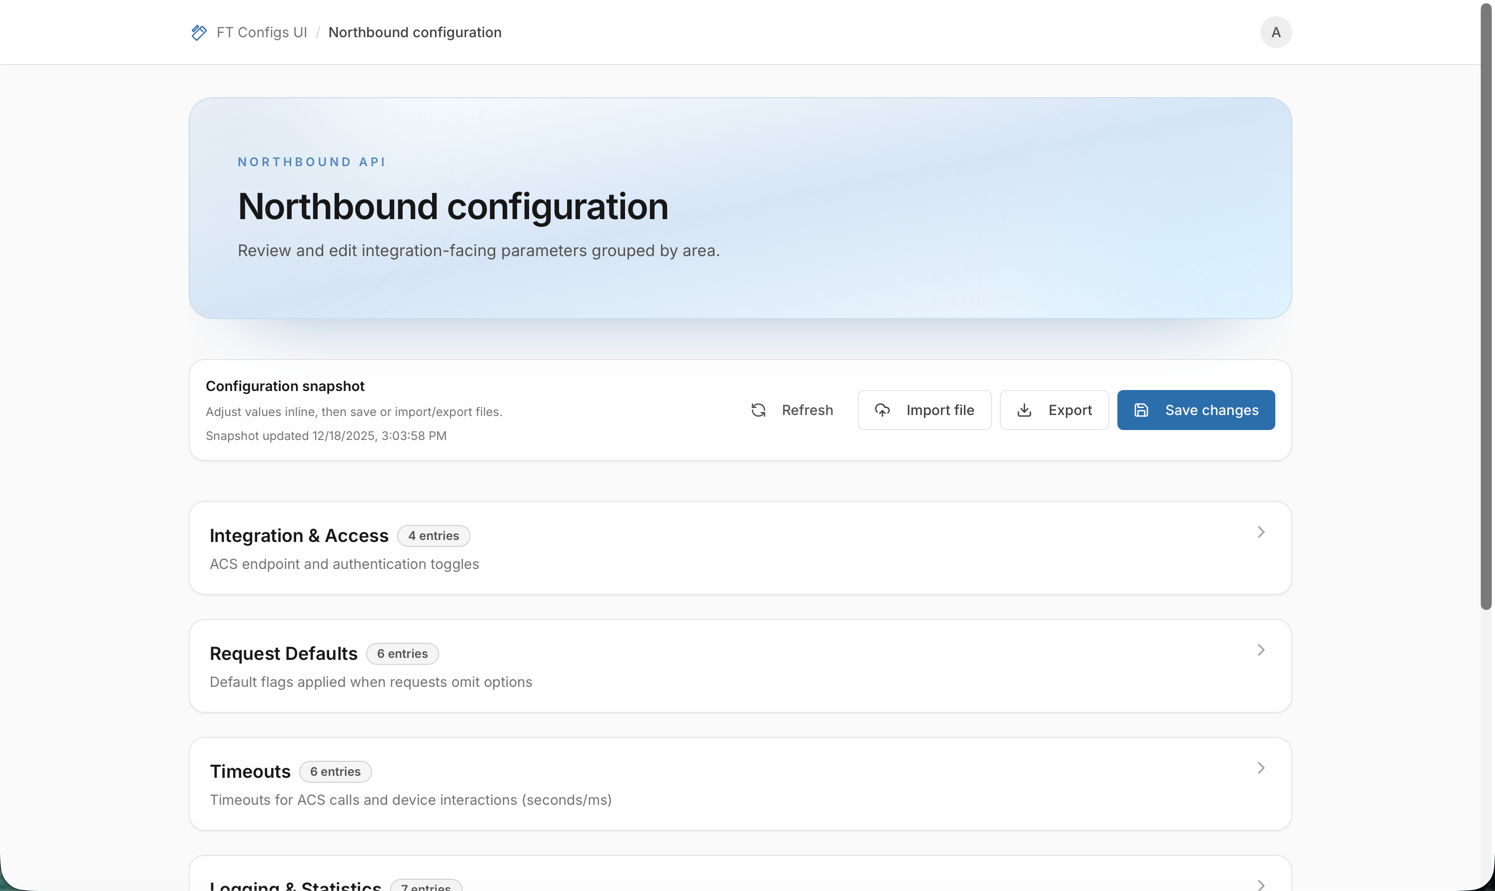
Northbound Config lets operators review and adjust integration-facing configuration values for the Northbound API. Use it to browse configuration groups, edit individual entries, and manage bulk changes by exporting a snapshot or importing a file. These settings can affect external integrations. Work in small steps. Use the inline validation when you edit. Always run a dry-run before you apply an import.
Where to find parameter descriptions: The system stores a description for each parameter and shows it on the page. You see the group description under the group title. You see the parameter description under the parameter name, above the key.
When to use it
Use Northbound Config when you need to:
-
review the current northbound configuration by group,
-
change editable entries (EDITOR and ADMIN),
-
export a snapshot as a backup before you make changes,
-
import many changes from a file (EDITOR and ADMIN).
Before you start
-
Sign in to the correct environment, for example staging or production.
-
Northbound Config has no Client type selector.
-
Check your role:
-
VIEWER can browse the configuration and use Export.
-
EDITOR and ADMIN can also edit values (Save changes) and use Import file.
-
| A VIEWER account works in read-only mode. You cannot save or import. |
Find an entry
-
Open Northbound Config.
-
Optional: Click Refresh to load the latest snapshot.
-
Expand a configuration group to see its entries.
| The page has no search or filter control. Expand the group and scroll to find an entry. |
Expected result:
-
Each group is a card with a title, an optional description, and the number of entries.
-
Each entry is a card with a label, a description, and an entry code in monospace font.
-
Each entry has a value editor: an input, a switch, a list, or a text area.
-
Each entry can show the badges Required, Locked, Secret, and Changed.
-
A read-only entry has the badge Locked. You cannot edit it.
Change an entry
You need the role EDITOR or ADMIN. The page does not save your edits automatically. The portal saves your changes only when you click Save changes.
-
Open the group.
-
Change the entry value.
-
Check the inline validation message under the field and in the page alert.
-
Click Save changes.
Expected result:
-
If the save works, the page confirms it and the Changed badge disappears.
-
If you changed nothing, Save changes shows the message No changes to save.
-
If an entry has a validation error, you cannot save until you fix the marked fields.
The inline validation checks these rules:
-
A required field cannot be empty.
-
The value must match its type: Boolean, Integer, or URL.
-
An entry can have more limits: minimum and maximum, allowed values, or a regular expression.
| Do not leave or refresh the page with unsaved edits. You lose the edits. |
To check the result:
-
Open the changed group again.
-
Check the value.
-
Optional: Export a snapshot for audit. See Export a Snapshot.
Export a snapshot
Export downloads the current Northbound configuration as a .properties file.
-
Open Northbound Config.
-
Click Export.
-
Save the file in a safe place where you can trace it, for example a ticket attachment or versioned storage.
For the best practices on when to export, file names, and retention, see Export a Snapshot.
Import with dry-run
The import uses the unified import dialog.
A dry-run is required.
The file picker accepts .properties and .xml files, for example api.properties or Settings.xml.
-
Recommended: Export a snapshot first. See Export a Snapshot.
-
Click Import file.
-
Choose an import mode.
-
Select the file or drag it into the dialog.
-
Review the Dry-run completed panel.
-
If the panel lists errors, fix the file and select it again.
-
If the dry-run reports no errors, click Import file to apply the import.
The import modes work as follows:
-
MERGE adds or updates the keys in the file.
-
REPLACE overwrites the existing keys. It removes the entries missing in the file.
For the definitions, see Glossary.
Expected result:
-
The dry-run starts automatically after you select a file and after you change the import mode.
-
A new file or a new mode makes the previous dry-run invalid and starts a new one.
-
You cannot apply the import until the dry-run shows zero errors.
Import safety checklist
-
Check the environment name.
-
Check the selected client type. It must match the file.
-
Export a snapshot before you change data.
-
Run Dry-run and review:
-
the errors: you must fix them,
-
the warnings: you must understand them,
-
the create, update, and delete counts.
-
-
If you use REPLACE, review the deletions in the dry-run plan. Continue only if you accept them.
-
Apply the import.
-
Refresh the page and open the changed entries to check them.
| In Northbound Config, the dry-run panel shows validation errors only. It does not show the create, update, and delete counts or warnings. |
For common import concepts and terms, see Import with Dry-run.
To check the result after the import:
-
Click Refresh.
-
Open the affected groups again and check the new values.
-
If you used REPLACE, check a few entries. They must stay the same.
Troubleshooting
- Save changes does not save the values
-
The fields have validation errors. Fix the errors under the fields and in the page alert, then try again.
- You cannot edit or import
-
Your role is not EDITOR or ADMIN. A VIEWER account is read-only.
- The Import file button stays disabled
-
The dry-run is not finished, or it lists errors. Wait for the dry-run to finish. If it lists errors, fix the file and select it again.
- The import fails
-
The file extension or the file content is not correct. Use the extension
.propertiesor.xml. Start from an exported snapshot. - The page shows no configuration
-
The snapshot is empty or you are in the wrong environment. Click Refresh. If the page stays empty, check the environment or import a file to load the configuration.