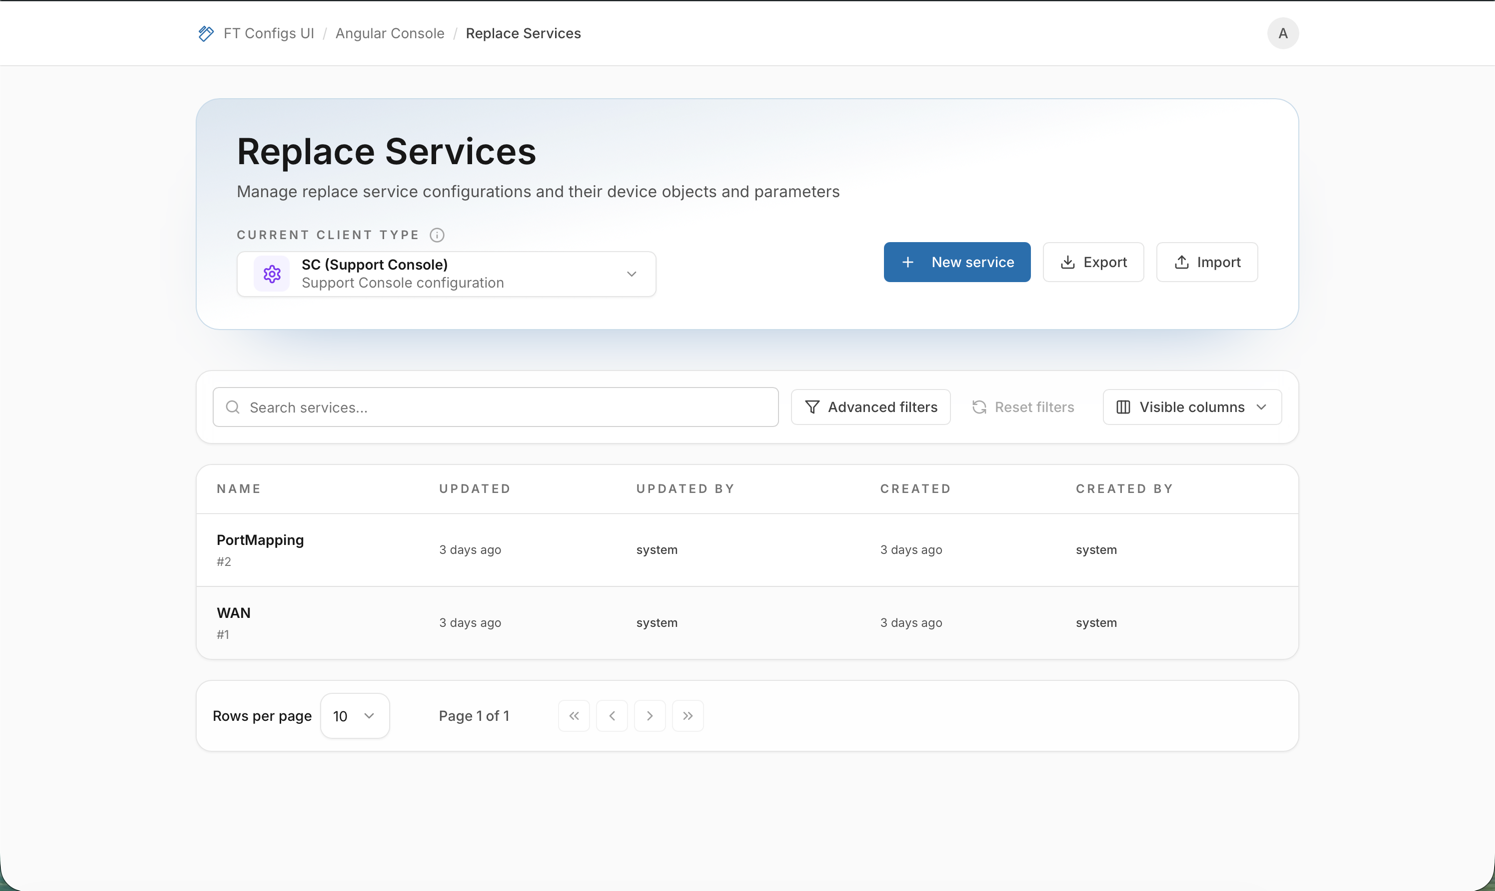
Replace Services
|
This module is not available in the current version. It will be available in a future version. Use this page for reference only. |
Replace Services lets you manage service configurations for a selected Client type. A configuration includes nested device objects and parameters. These configurations set the available service mappings and the parameters of each service. Be careful in this module. Changes can affect nested structures, and a deletion also deletes related objects and parameters.
Where to find parameter descriptions: The page shows field labels only. The service details page shows a short hint under each section title.
When to use it
Use Replace Services to do these tasks:
-
Browse existing replace service configurations.
-
Create or change a configuration in a controlled way.
-
Export a snapshot before changes.
-
Import many updates safely with a dry-run preview.
Before you start
-
Open Replace Services from the Angular Console dashboard.
-
Select a Client type (DEF, MC, or SC).
-
Check your role.
Your role sets what you can do:
-
VIEWER: browse and export.
-
EDITOR and ADMIN: create, change, delete, and import.
| If you do not select a Client type, the module shows an empty page. Actions are disabled or blocked until you select a Client type. |
Key terms:
- Configuration
-
One row in the list is one replace service configuration. The service name identifies the configuration in the selected Client type.
- Details sheet
-
If you select a row, the details sheet opens. The sheet shows the configuration with its nested objects and parameters. If your role allows it, you can change or delete the configuration there.
- Dry-run preview
-
Imports and edits can change nested data: services, objects, and parameters. The dry-run preview shows the exact plan before the system applies anything. The plan lists created, updated, deleted, and duplicate entries.
Find a service
-
Select the required Client type.
-
Enter a service name in the search field.
-
Optional: open Advanced filters, and enter Updated from and Updated to to narrow the list by update date.
-
Select a row to open the details sheet.
Expected result:
-
The list shows the services of the selected Client type with the updated and created information.
-
The details sheet shows the service configuration with its nested objects and parameters.
Create a service
You need the EDITOR or ADMIN role.
-
Select the required Client type.
-
Click New service.
-
Enter a Service Name.
-
Save the service.
Expected result:
The new service appears in the list for the selected Client type. You can open it in the details sheet.
Use clear and stable names, for example WAN or PortMapping.
Clear names make services easy to search and audit.
|
Change a service
You need the EDITOR or ADMIN role.
-
Open the details sheet of the service.
-
Click Edit.
-
Add, change, or remove objects and parameters.
-
Click Save.
-
Refresh the list and open the service again.
| If you remove objects or parameters, the UI can show a confirmation. The confirmation lists what the system deletes when you save. Read the list carefully before you confirm. |
Delete a service
You need the EDITOR or ADMIN role.
-
Open the details sheet of the service.
-
Click Delete.
-
Confirm the deletion.
| If you delete a service, the system also deletes its objects and parameters. If you may need the old state, export a snapshot first. |
Export a snapshot
-
Select the required Client type.
-
Click Export.
-
Save the downloaded JSON file.
| Store the snapshot with the change ticket. Add the module, the Client type, and the date to the file name. For details, see Export a Snapshot. |
Import with dry-run
Use import to apply many changes at once. Always follow this order: export, dry-run, apply.
-
Export a snapshot first: Export a Snapshot.
-
Click Import.
-
Select the import mode: MERGE or REPLACE.
See Merge vs Replace.
-
Select a JSON file.
-
Wait for the dry-run preview to finish.
-
The dry-run starts automatically after you select a file.
-
If you change the file or the import mode, the dry-run runs again.
-
-
Review the preview:
-
the summary counts for services, objects, and parameters,
-
the created, updated, deleted, and duplicate changes,
-
the detailed changes for nested services, objects, and parameters,
-
the warnings and errors.
-
-
Click Confirm import only if the preview matches your intent.
| Imports can delete nested objects and parameters. If the Deleted count is large, stop, especially in REPLACE mode. Check the file for missing entries. Check the selected Client type. |
| If the preview reports duplicates, resolve the conflicts in the source JSON file. For example, rename or remove the conflicting entries. Then run the preview again. |
Import safety checklist
-
Check the environment name.
-
Check the selected client type. It must match the file.
-
Export a snapshot before you change data.
-
Run Dry-run and review:
-
the errors: you must fix them,
-
the warnings: you must understand them,
-
the create, update, and delete counts.
-
-
If you use REPLACE, review the deletions in the dry-run plan. Continue only if you accept them.
-
Apply the import.
-
Refresh the page and open the changed entries to check them.
Check the result
After any change or import, do these steps:
-
Check the selected Client type.
-
Open the changed service in the details sheet.
-
Check a few nested objects and parameters with expected changes.
-
Check a few without expected changes.
-
Recommended: export a new snapshot for audit and for a later restore.
Troubleshooting
- The page shows no data
-
The Client type can be missing, or a filter can be too narrow. Select the Client type and clear the search text and Updated from and Updated to.
- You do not see Create, Edit, or Import
-
You are probably signed in as VIEWER. Only EDITOR and ADMIN can change and import.
- Dry-run shows many deletions
-
You can have selected REPLACE, or the file is incomplete for the selected Client type. Switch to MERGE, or create the file again from a snapshot, and try again.
- Dry-run shows errors
-
The file has a wrong JSON structure or invalid values. Export a new snapshot, apply your changes to it, and import again.
- Nested changes are not expected
-
Read the detailed preview carefully. Compare the Client type and the import mode with your plan.